Ribbon Rose Tutorial
Making ribbon roses is fairly easy with just a little practice. Finished ribbon roses can be used for hats, headbands and other fascinators, brooches, unique one-of-a-kind jewelry, and for wedding decorations.
The length of ribbon needed depends on the width of the ribbon and also on the desired fullness of the finished flower. I usually unwind a few feet of ribbon and leave it on the spool until I’m nearly finished making the ribbon rose.
A ribbon rose may be secured with stitches near its base as it is made, or it may be secured with stitches when it is finished, or it may be secured with florist’s wire for arrangements.
This ribbon rose tutorial shows how to secure the ribbon rose with stitches as it is being made.
1. Begin by unwinding at least 24 to 30 inches of ribbon.
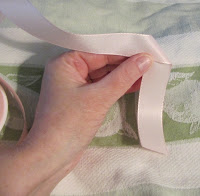
2. Holding the ribbon in the left hand, fold ribbon back/down at a 90 degree angle about 6 inches from the end. This 6 inch ribbon tail becomes the stem. The remaining long piece of ribbon is the working ribbon.
3. Roll the right edge of the tail toward the left edge.
4. Keeping the folded edge near the top of the rose bud, roll the bud right-to-left until nearly at the end of the folded edge. This would be a good time to start stitching the base of the rose if you want to secure it as it’s being made.
5. While holding the base of the rose bud with the right hand, fold the working ribbon away from you creating a 90 degree fold. Keep adding stitches to secure it as you go (optional).
Repeat steps 4 and 5 as many times as necessary to achieve desired fullness.
This rose will be finished without a stem for a flat backing. Cut the stem off, leaving about a half-inch of stem, then fold this down and stitch securely.
I use this method to make fabric roses for the front of my Kindle cases too:
What other uses would they be good for?
Cindy
The length of ribbon needed depends on the width of the ribbon and also on the desired fullness of the finished flower. I usually unwind a few feet of ribbon and leave it on the spool until I’m nearly finished making the ribbon rose.
A ribbon rose may be secured with stitches near its base as it is made, or it may be secured with stitches when it is finished, or it may be secured with florist’s wire for arrangements.
This ribbon rose tutorial shows how to secure the ribbon rose with stitches as it is being made.
1. Begin by unwinding at least 24 to 30 inches of ribbon.
3. Roll the right edge of the tail toward the left edge.
4. Keeping the folded edge near the top of the rose bud, roll the bud right-to-left until nearly at the end of the folded edge. This would be a good time to start stitching the base of the rose if you want to secure it as it’s being made.
Repeat steps 4 and 5 as many times as necessary to achieve desired fullness.
This rose will be finished without a stem for a flat backing. Cut the stem off, leaving about a half-inch of stem, then fold this down and stitch securely.
I use this method to make fabric roses for the front of my Kindle cases too:
What other uses would they be good for?
Cindy


Very nice! I am not crafty at all, so I am super impressed! :)
ReplyDeleteNice to meet you today!! :)
Oh, I'm so happy I found this tutorial!
ReplyDeleteI was looking to make one last month for an altered heart box i made and nobody knew how to make one (ok it was 2am and there weren't too many of us and some of them were a bit tipsy...)
Yay! I can't wait to try it out and add it to my box.
Thank you,
Pam Hoffman
http://mycre8tivelife.blogspot.com/
http://twitter.com/PamHoffman
This is a great tutorial. I love the step-by-step photos!
ReplyDelete